Final Walkthrough Checklist for Boise Home Buyers: A 15-Point Relocation Guide
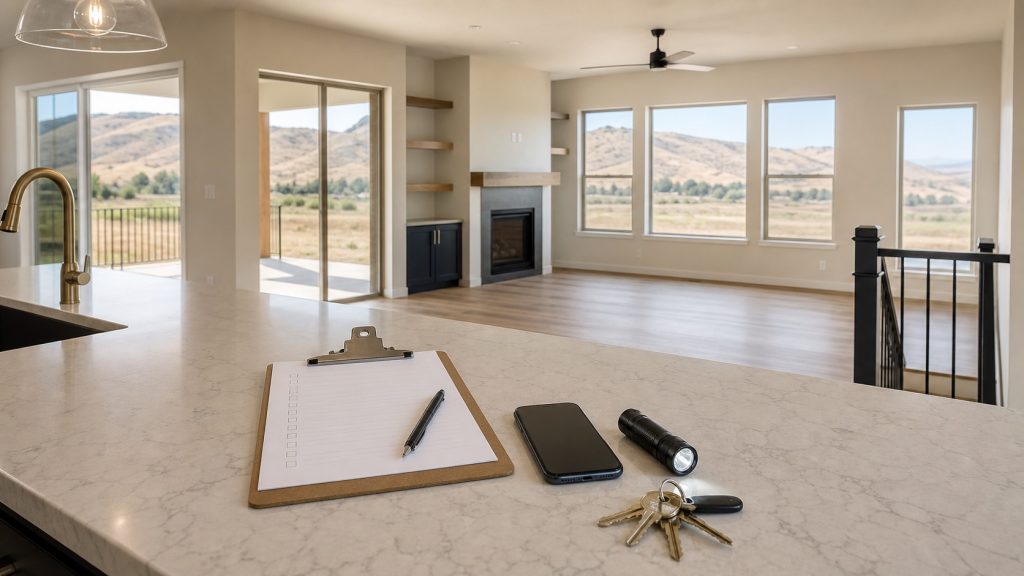
A Boise final walkthrough checklist helps buyers verify agreed repairs, included items, major systems, property condition, delivery condition under the signed possession and occupancy terms, and access items before closing. Compare every check with your signed documents and report material differences to your agent before closing.
The final walkthrough is a late-stage opportunity to confirm the home’s condition before closing. It is primarily a verification step, not a substitute for a professional home inspection, though it can absolutely reveal new damage, incomplete work, missing agreed items, or conditions that were previously concealed or inaccessible behind furniture and belongings. You are confirming the property matches what your signed purchase documents call for: agreed repairs appear complete, included appliances and fixtures are still there and working, nothing new is broken, and the home is in the condition your agreement requires. Freddie Mac’s consumer homebuying guidance describes the walkthrough the same way: check that required repairs have been made, that the home is in the agreed-upon condition, and that the seller has vacated. Treat that last point as general consumer guidance rather than a universal rule. Confirm whether the seller must be fully vacated at the walkthrough, at closing, or on a later possession date under your signed possession and occupancy terms, because some transactions allow the seller to retain possession or occupancy after closing. Below is a 15-point checklist designed to help Boise and Treasure Valley relocation buyers organize the walkthrough, presented in the order I recommend using it, along with what to compare each check against, what evidence to capture, and when to call your agent before closing. Not every point applies to every property. Several checks depend on what your specific home includes, and I have labeled those clearly.
This guide is written for Boise and Treasure Valley buyers who are under contract and approaching closing, especially relocation buyers coming from out of state.
I’m Brian Hymas. I worked as a residential appraiser before becoming an agent, and I’ve spent 35 years in the Treasure Valley. That appraisal background changed how I walk a house. Most buyers wander through the walkthrough emotionally, picturing furniture. I’m checking whether the work the seller promised actually got done and whether anything changed since the inspection. This checklist gives you that same discipline.
One thing before we start: the walkthrough does not replace the inspection. The inspection is the deep, professional evaluation of the home’s systems, done earlier in the transaction. The walkthrough compares the home against three things: your purchase agreement and related documents, your inspection records and any repair agreements, and the condition you last saw it in. Even so, keep your eyes open. Homes that have been emptied of furniture routinely show things nobody could see before, and a walkthrough that surfaces a new problem has done its job. Your signed contract controls what is included with the home, what condition it must be delivered in, and what options may be available if something is off. Those answers vary transaction to transaction, so nothing in this article can promise a particular outcome or remedy. This checklist reflects how I approach walkthroughs as an agent, not legal advice. Your signed Idaho purchase documents and your agent’s transaction-specific guidance control.
One more safety note that applies to every operational check below: only test equipment you can operate safely, follow the manufacturer’s instructions, and stop immediately if you see, hear, or smell anything abnormal. When you are not sure a system can be operated safely, do not test it. Note it, photograph it, and ask your agent about a qualified professional evaluation instead. The same principle applies to where you go during the walkthrough: inspect only areas that are authorized and safely accessible.
The 15 Checks at a Glance
Items marked “if applicable” depend on the specific property and what your contract includes.
- Agreed repairs completed
- Included appliances present and working (if appliances are included)
- Plumbing: faucets, drains, toilets, under-sink checks
- Water heater
- Heating and cooling
- Electrical: lights, switches, accessible outlets
- Windows and doors
- Garage door, openers, and access devices (if applicable)
- Walls, ceilings, and floors for new damage
- Kitchen systems: range, dishwasher, disposal, hood (as equipped)
- Laundry hookups and included washer or dryer (if included)
- Exterior and included outdoor features (as applicable)
- Property-specific systems: irrigation, well, septic, HOA-maintained elements (only if the property has them)
- Delivery condition: belongings, cleanliness, and accessible storage areas, as required by your signed possession and occupancy terms
- Keys, remotes, codes, manuals, and warranties
Before You Arrive: What to Bring
Do not walk a house from memory. Bring these, on paper or on your phone:
| What to bring | Where it comes from | Why it matters at the walkthrough |
|---|---|---|
| Signed purchase agreement | Your transaction file | Defines what is included with the home and the condition terms you agreed to |
| Repair addendum and receipts | Your agent or the seller’s side | This is the punch list for verifying agreed repairs |
| Included-items documentation | Your transaction file | Confirms which fixtures, appliances, and access devices the parties agreed convey |
| Inspection report | Your inspector | Separates issues you already knew about from new problems |
| Utility transfer confirmations | Each utility provider | Prevents arriving at closing week with no power, water, or gas scheduled |
| Photos and video from your showings | Your own phone | Your baseline for spotting changes since you last saw the home |
When Should the Walkthrough Happen?
Get the order of authority right, because it saves arguments later:
- Your signed purchase agreement and any amendments control whether and how a walkthrough happens in your transaction.
- Your possession and occupancy terms determine when the seller must be out and when you get access.
- Your transaction and closing schedule sets the practical window.
- Your agent’s transaction-specific guidance applies all of the above to your actual dates.
- My general practice is to schedule the walkthrough close to closing and, when practical and when your possession terms call for the seller to be out by then, after the seller has moved out, so you are seeing the condition you will actually receive. Freddie Mac’s consumer guidance similarly suggests requesting a formal walkthrough about 24 hours before closing, but treat that as general consumer guidance, not a universal rule. Your documents and your agent drive the exact timing.
The 15-Point Final Walkthrough Checklist
Work top to bottom. With permission where required, capture clear photos or video of what you test and of any material concerns, and note the date and location of each. Ten extra minutes of documentation gives you a clear record of exactly what condition the home was in on walkthrough day, which matters most for out-of-state buyers who cannot easily come back.
1. Agreed Repairs Completed
What to test: Every item on your repair addendum or inspection response, where applicable. Operate whatever was repaired, following any posted or manufacturer instructions. If the water heater was serviced, run hot water. If a window was replaced, open and close it. Compare against: The signed repair agreement and any receipts or invoices the seller provided. Evidence to capture: Photo of each completed repair next to the corresponding line item, plus photos of receipts. Call your agent when: Any repair appears incomplete, done differently than agreed, or has no documentation. Your agent can walk you through what options your agreement may provide.
2. Included Appliances Present and Working (If Appliances Are Included)
What to test: Every appliance your contract and included-items documentation say stays. Before you run anything, confirm it appears safe and ready to operate: connected, upright, undamaged, and not showing leaks or burn marks. Then power each one on and run a basic cycle or function according to the manufacturer’s instructions. Do not run equipment empty when its manufacturer advises against it, and stop immediately if you notice leaking, a burning odor, sparking, or abnormal noise or vibration. Compare against: The included-items section of your purchase agreement and any related documentation. Confirm brand and model where you can; a swapped-out appliance is a real thing that happens. Evidence to capture: Photo of each appliance running, including model and serial stickers. Call your agent when: Anything your documents list as included is missing, swapped, or not functioning, or when you cannot confirm an appliance is safe to test. A qualified professional evaluation beats an improvised test every time.
3. Plumbing
What to test: Run every faucet hot and cold, watch drains empty, flush every toilet, and open every under-sink cabinet to look and feel for moisture. Compare against: Your inspection report. A slow drain the inspector flagged is a known condition. A wet cabinet floor that was dry at inspection is a change worth documenting. Evidence to capture: Video of water running at each fixture, photos under each sink. Call your agent when: You find an active leak, new water staining, or a fixture that worked at inspection and does not work now.
4. Water Heater
What to test: Confirm hot water actually arrives at faucets, and look at the unit itself for leaks, corrosion at fittings, or pooling at the base. Look, do not touch or adjust the unit’s settings, valves, or panels. Compare against: The inspection report and any repair or service receipts. Evidence to capture: Photo of the unit, its label, and the surrounding floor. Call your agent when: There is no hot water, visible leaking, or evidence of a problem that was not in your inspection report.
5. Heating and Cooling
What to test: Operate the system from the thermostat following the manufacturer’s guidance, and confirm air actually moves at the vents. Do not switch rapidly back and forth between heating and cooling modes; give the system time between mode changes. Do not run the air conditioning when outdoor conditions, the equipment’s limitations, or the manufacturer’s guidance make cooling operation inadvisable, which is a real consideration for Treasure Valley walkthroughs that land in cold months. If you hear unusual sounds, smell something off, see leaking or fault codes, or anything else seems wrong, shut it down and stop. When you are not confident the system can be tested safely, skip the test and ask your agent about a qualified HVAC evaluation instead. Compare against: Contract terms and the inspection record. Evidence to capture: Video of the thermostat set point and a vent responding, or a note explaining why a mode was not tested. Call your agent when: A system does not respond, performance is clearly different from inspection day, or conditions prevented a safe test of a system your documents say must work.
6. Electrical
What to test: Flip every light switch and test a sampling of accessible outlets with a phone charger. For GFCI outlets in kitchens, baths, and the garage, use the built-in TEST and RESET buttons the way the Electrical Safety Foundation International describes: press the RESET button, plug in a nightlight or similar small device and confirm it is on, press TEST and the device should turn off, then press RESET and the device should turn back on. ESFI’s guidance is that a GFCI whose test or reset functions do not work should be replaced, which for walkthrough purposes means note it and stop. Limit yourself to accessible devices you can operate safely and according to the manufacturer’s instructions. Do not remove cover plates, touch wiring, open the electrical panel, or repeatedly reset a device that keeps tripping. If an outlet will not test or reset normally, shows damage, feels hot, sparks, or produces an unusual odor, stop and note it for qualified evaluation. And keep the result in perspective: a passing button test tells you that device responded, not that the home’s electrical system is safe overall. That deeper question belonged to your inspection. Compare against: Your inspection report for anything already noted. Evidence to capture: Note or short video of any dead switch, dead outlet, or GFCI that fails to test or reset. Call your agent when: Something that worked at inspection is dead, or you find scorching, buzzing, a tripped breaker, or a GFCI that will not reset. Do not keep resetting it yourself.
7. Windows and Doors
What to test: Open, close, latch, and lock every exterior door and a full pass of windows. Check glass for new cracks or broken seals you did not see before. Compare against: Your showing photos and the inspection report. Evidence to capture: Photos of any new damage, video of any lock that will not secure. Call your agent when: There is new glass damage or a door or window that will not lock. That is both a condition question and a security issue on a home you are about to own.
8. Garage Door, Openers, and Access Devices (If Applicable)
What to test: Run the garage door up and down from the wall button and from every available remote. The U.S. Consumer Product Safety Commission’s consumer guidance on garage door openers warns that openers that fail to reverse are a hazard, and it advises consumers to test their openers according to the manufacturer’s recommendations. So test the photo-eye sensors and the auto-reverse function only by following the opener manufacturer’s published procedure, which is typically printed on the opener unit or in its manual. Never use a person, a pet, or anything valuable as a test obstruction. If the opener has no visible instructions and no manual, note that and ask your agent or a garage-door professional rather than improvising a test. Compare against: Your purchase agreement and any included-items documentation. Do not assume remotes, keypads, gate controls, or smart-home devices convey automatically. Verify exactly what your documents say is included, and account for those specific items. Evidence to capture: Video of the door cycling, photo of the remotes and access devices laid out. Call your agent when: The door does not operate, fails the manufacturer’s safety tests, or an access device your documents list as included is unaccounted for.
9. Walls, Ceilings, and Floors
What to test: Walk every room slowly and look at surfaces that were hidden by furniture, rugs, and wall art when you toured. Look up at ceilings for new staining, especially under bathrooms and around the roofline. This check is exactly why the walkthrough can still surface discoveries: an emptied home shows what a furnished home concealed. Compare against: Your showing photos and video. This is exactly why I tell clients to film the home the day we tour it. Evidence to capture: Photos of anything that was not there before. Call your agent when: You find new water staining, significant new damage, or flooring damage beyond what you observed before. For ordinary marks like small nail holes from the seller’s pictures, document them and let your agent tell you how your specific agreement treats them. What counts as a problem, and what options exist, depends on your signed documents, so when in doubt, photograph it and ask rather than assuming either way.
10. Kitchen Systems
What to test: Every burner, the oven, the dishwasher on a short cycle, the disposal, and the range hood fan and light, as the home is equipped. Follow the manufacturer’s operating instructions for each. For the disposal: run water, switch it on briefly, and listen. Never put your hand or any object into a disposal, whether it is on or off. For the dishwasher and oven, confirm they appear connected and undamaged before starting them, and do not run equipment empty if the manufacturer advises against it. Stop any test at the first sign of leaking, burning odor, sparking, or abnormal vibration, and flag the item for qualified evaluation instead of retrying. Compare against: Purchase agreement, included-items documentation, and inspection report. Evidence to capture: Video of burners lit and the dishwasher starting. Call your agent when: Any built-in does not function, shows a hazard sign during testing, or an item your documents list as included is missing.
11. Laundry (If Included)
What to test: If your documents say the washer and dryer convey, run each briefly per the manufacturer’s instructions after confirming they are connected and safe to operate. If they do not convey, inspect the hookups and the floor behind where the units sat for hidden water damage. Compare against: The included-items documentation. Evidence to capture: Photos of hookups and flooring, video of included units running. Call your agent when: Included units are gone or you find water damage that was concealed by the machines.
12. Exterior and Included Outdoor Features (As Applicable)
What to test: Walk the full perimeter. Check siding, fencing, gates, decks, and confirm every included outdoor feature is still there: sheds, play structures, hot tubs, mounted patio TVs, whatever your contract lists. Only operate powered outdoor equipment such as hot tubs or gate motors if you can do so safely and per manufacturer instructions; otherwise verify presence and condition visually and note anything untested. Compare against: The purchase agreement, included-items documentation, and your earlier photos. Evidence to capture: Wide shots of each side of the home plus close-ups of any new damage. Call your agent when: An included feature is missing or there is new exterior damage.
13. Property-Specific Systems (Only If the Property Has Them)
What to test: This check depends entirely on what your property actually has, so match it to the home, not the zip code. If the home is on a private well or septic system, confirm any contracted work on those systems was completed and documented. If there is a sprinkler or pressurized irrigation system, ask for a demonstration or run a zone only if the season allows and the system’s controls can be operated per the manufacturer’s or installer’s instructions; irrigation systems that have been winterized should not be pressurized for a test. If the property has outbuildings, gates, pumps, or acreage features your contract includes, confirm they are present and, where safe and practical, operable. If the home is in an HOA, ask your agent to help you sort which elements the HOA maintains versus what becomes your responsibility. On new construction, walk the finish items with extra care. Treasure Valley properties vary in age, utility setup, HOA responsibility, and property type, so let your specific property and your transaction documents drive this list. For pumps, well equipment, and septic components, favor documentation review and professional evaluation over hands-on testing; these are not systems to experiment with on walkthrough day. Compare against: Contract terms, repair addenda, and any well, septic, irrigation, or HOA documentation your transaction included. Evidence to capture: Video of irrigation running if safely demonstrated, photos of system documentation. Call your agent when: Agreed work is not documented, or a system that was represented as functional does not operate. If you are coming from city water and a small lot, budget extra time here. These systems are new territory for a lot of relocation buyers.
14. Delivery Condition: Belongings, Cleanliness, and Accessible Storage Areas
What to test: Check the closets, cabinets, garage, sheds, and storage areas that are safely and lawfully accessible for leftover belongings, debris, paint cans, damage, missing included items, or newly visible conditions. If attic or crawl-space access is permitted and can be viewed safely, limit yourself to a visual check from the access point. Do not enter an attic, crawl space, or any other hazardous, locked, or restricted area during the walkthrough, and do not assume access is authorized just because the space is part of the property. Deep evaluation of those spaces belonged to your professional inspection, not to walkthrough day. Compare against: Your contract’s possession and occupancy terms and the condition the home is to be delivered in. Confirm whether the seller must be fully vacated at the walkthrough, at closing, or on a later possession date under your signed documents. Freddie Mac’s general consumer guidance lists confirming the seller has vacated as one of the walkthrough’s core purposes, but treat that as general framing rather than an Idaho-specific rule; some transactions permit seller possession or occupancy after closing, and your signed documents control. Evidence to capture: Photos of any accessible spaces left full of the seller’s property. Call your agent when: Significant belongings or debris remain beyond what your possession and occupancy terms allow and you are closing within days. Hauling costs money and time you do not have during a relocation.
15. Keys, Remotes, Codes, Manuals, and Warranties
What to test: Account for house keys, mailbox keys, garage remotes, gate codes, smart lock and thermostat credentials, appliance manuals, and any transferable warranty paperwork that your documents or your agent’s closing coordination say will be delivered. Compare against: Your purchase agreement, included-items documentation, and what your agent has confirmed for closing. Evidence to capture: A single photo of everything laid out on the kitchen counter. Call your agent when: Anything on this list is unaccounted for, especially mailbox keys and access codes, which are the two things I see chase buyers around for weeks after closing.
Found Something? Sort It Into One of Five Buckets
In my experience walking buyers through homes across the Treasure Valley, walkthrough stress almost always comes from mixing these categories up:
- New damage that appeared after your inspection
- Incomplete agreed repairs, where the seller committed to work that was not done or was done differently
- Missing included items listed in your contract or included-items documentation
- Ordinary observations and cosmetic wear, which your agent can help you weigh against what your agreement actually requires
- Known inspection items you already knew about, which are typically handled according to whatever your inspection response and related documents say
Document anything meaningful in any bucket and report it to your agent promptly, before closing. I flag the first three hardest, but the honest answer is that what counts as significant, and what options may be available, depends on your signed agreement and your specific facts. The walkthrough itself does not create or remove rights; your documents do. So do not assume a particular remedy exists, and do not assume one does not. A well-documented issue raised before closing gives you and your agent documented facts to compare with the agreement while the transaction is still open. Speed and evidence are your two jobs.
Relocation Buyer Extras: Closing From Out of State
If you are moving here from Washington, California, or anywhere else, a few additions to the core checklist. I regularly work with out-of-state buyers, and these are the closing-week items that separate a smooth landing from a stressful one.
Attend in person if you can, and plan the trip around closing, not showings. Land the day before, sleep locally, and walk the home fresh the next morning with buffer time. Your signed agreement, possession terms, and closing schedule set the real constraints, and your agent will place the walkthrough inside them. Within those constraints, my general practice is to schedule close enough to closing to catch late changes, but not so tight that a discovered problem becomes a crisis instead of a conversation. If you cannot attend, ask your agent what remote walkthrough arrangements are permitted and practical for your transaction. A live room-by-room video review or agent-provided documentation may be possible, but the purchase agreement and transaction arrangements control who may attend and how the walkthrough is handled.
Vacant homes deserve a slower walk. A home that has sat empty between inspection and closing has had nobody running water or noticing small changes. Take your time on the plumbing and moisture checks in particular.
Confirm utilities before you fly. Power, water, sewer or septic service, gas, trash, and internet transfers should be scheduled before closing so you are not standing in a dark house with a moving truck outside. Keep the confirmation numbers in the same folder as your contract.
Match your movers to your possession date. Your contract sets when you actually get access. Verify that date against your moving truck schedule before either is locked in.
Earlier in the relocation process? Start with my complete out-of-state guide to buying in the Treasure Valley, then compare whether to sell your current home before buying in Boise and what to expect when hiring a Boise buyer’s agent. Your eventual walkthrough emphasis should follow the property itself: municipal water or private well, sewer or septic, HOA-maintained or owner-maintained elements, resale condition or new-construction finish items.
Quick Reference: All 15 Checks
| Check | Applies when | What to examine | Compare against | If something looks wrong |
|---|---|---|---|---|
| 1. Agreed repairs | A repair agreement exists | Completion and operation of each repair item | Repair agreement and receipts | Photograph next to the line item and notify your agent |
| 2. Included appliances | Appliances convey | Presence, model, and basic function, tested safely | Purchase agreement and included-items docs | Identify the exact missing or nonworking item |
| 3. Plumbing | Every home | Faucets, drains, toilets, under-sink moisture | Inspection report and prior condition | Video the leak or symptom and its location |
| 4. Water heater | Every home | Hot water delivery, leaks, corrosion | Inspection and service receipts | Photo the unit and surrounding floor |
| 5. Heating and cooling | Every home, when conditions allow safe testing | Operation from the thermostat per manufacturer guidance | Contract and inspection record | Note the setting, the response, and any untested mode |
| 6. Electrical | Every home | Switches, accessible outlets, GFCI test buttons | Inspection report | Record the location and symptom; do not keep resetting |
| 7. Windows and doors | Every home | Open, close, latch, lock, glass condition | Showing photos and inspection report | Photo new damage, video any failed lock |
| 8. Garage and access devices | Property has a garage or gated access | Door operation, manufacturer safety tests, remotes | Included-items documentation | List exactly what is missing or failing |
| 9. Walls, ceilings, floors | Every home | New staining or damage in uncovered areas | Your showing photos and video | Photograph and compare to your baseline |
| 10. Kitchen systems | As the home is equipped | Burners, oven, dishwasher, disposal, hood | Contract and inspection report | Identify the appliance and the issue |
| 11. Laundry | Units convey, or hookups exist | Included units or hookups and flooring behind | Included-items documentation | Photo hidden water damage or missing units |
| 12. Exterior | Features are included or seller-maintained | Siding, fencing, decks, included outdoor features | Contract and earlier photos | Wide shots plus close-ups of changes |
| 13. Property systems | Property has irrigation, well, septic, pumps, or HOA elements | System presence, documentation, safe demonstration | Property and transaction documents | Record the system and the specific concern |
| 14. Delivery condition | As required by the signed possession and occupancy terms | Belongings, debris, and delivery condition in safely and lawfully accessible areas | Signed possession and occupancy terms | Photograph what remains and notify your agent |
| 15. Keys and documentation | Every home | Keys, remotes, codes, manuals, warranties | Included-items docs and closing coordination | List what is unaccounted for before closing |
Sources and Method
This is an educational checklist, not a reproduction of any contract form and not legal advice. The buyer’s signed documents and the buyer’s agent’s transaction-specific guidance control in every case.
| Source | Publisher or owner | Published or updated | Accessed | Claims it supports |
|---|---|---|---|---|
| Closing your home purchase | My Home by Freddie Mac (Federal Home Loan Mortgage Corporation consumer education) | No publish date is listed on the page | July 11, 2026 | The general purpose of a final walkthrough: checking that required repairs have been made, that the home is in the agreed-upon condition, and that the seller has vacated. This article presents the vacancy point as general consumer guidance, not an Idaho-specific requirement; actual vacancy timing is controlled by each transaction’s signed possession and occupancy terms. Also the general consumer timing guidance that buyers should request a formal walkthrough about 24 hours before closing, which this article presents as common guidance rather than a universal rule |
| How to Use GFCIs | Electrical Safety Foundation International | No publication or update date displayed on the page | July 11, 2026 | The GFCI test procedure in Check 6: press RESET, plug in a nightlight or similar device and confirm it is on, press TEST and the device should turn off, press RESET and the device should turn back on. ESFI also states that a GFCI whose test or reset functions do not work should be replaced |
| Non-Reversing Automatic Garage Door Openers Are a Hazard (CPSC Publication 523) | U.S. Consumer Product Safety Commission | No publication or update date displayed in the document | July 11, 2026 | The garage-door safety advice in Check 8: garage door openers that fail to reverse are a hazard, and consumers should test their openers according to the manufacturer’s recommendations |
HVAC, appliance, disposal, and other equipment-operation guidance in this article defers to each manufacturer’s current published instructions rather than any single third-party source, and recommends qualified professional evaluation whenever safe operation is uncertain.
Frequently Asked Questions
What is a final walkthrough, and is it the same as an inspection?
No. The inspection happens earlier in the transaction and is a deep, professional evaluation of the home’s systems and condition. The final walkthrough happens near the end of the purchase process and is primarily a verification step: you are confirming the home matches the condition and included items your signed agreement calls for, that agreed repairs appear complete, and that nothing new has gone wrong since your inspection. It is not a substitute for an inspection, but it can still reveal new damage, incomplete work, missing items, or problems that furniture and belongings previously concealed.
When should I schedule my final walkthrough?
Start with your signed purchase agreement and any amendments, then your possession and occupancy terms, then your transaction and closing schedule, and let your agent apply those to your actual dates. Within those constraints, my general practice is to schedule the walkthrough close to closing and, when practical and consistent with your possession terms, after the sellers have moved out, so you see the condition you will actually receive. Freddie Mac’s consumer guidance similarly suggests requesting a formal walkthrough about 24 hours before closing, but your contract and your agent drive the specifics for your transaction.
Do I have to attend my final walkthrough in person?
Not necessarily. Whether you may attend remotely or have your agent conduct the walkthrough depends on your purchase agreement and transaction arrangements, but attending in person is preferable when practical. If you cannot attend, ask your agent whether a live room-by-room video review or another documented remote arrangement is available for your transaction.
What documents should I have with me during the walkthrough?
My standard recommendation: your purchase agreement, any included-items documentation, the repair addendum, any repair receipts the seller provided, and your original inspection report. Everything you check should be compared against something in writing. If your documents say the refrigerator stays, you verify the refrigerator is there. If the repair agreement says the water heater was serviced, you look for the receipt and test the hot water.
What happens if I find a problem during the final walkthrough?
Document it immediately with photos and video, and alert your agent right away. What happens next depends on your signed contract and your specific situation, so no blog post can promise a particular outcome. The important part is speed and evidence. A well-documented issue raised before closing gives you and your agent documented facts to compare with the agreement while the transaction is still open.
What should relocation buyers check that local buyers might overlook?
Utility coordination is the big one. When you are moving from out of state, you are juggling movers, travel, and possession timing all at once. Confirm your utility transfers are set up before closing so you are not standing in a new house with no power or water. Also verify possession timing in your contract, because your moving truck schedule needs to match the date you actually get access. And if you bought a property with a well, septic, or irrigation system, give those items more time than you think they need.
Ready to Walk Through Your Next Home Together?
The final walkthrough is one of the last verification steps before you get the keys, and it is not the place to rush. If you are relocating to Boise, Meridian, Eagle, or anywhere in the Treasure Valley, I will help you plan the walkthrough, compare the home against the transaction documents, and document concerns before closing. If you cannot be here in person, we will determine what remote arrangement is permitted and practical for your transaction. That is what the Buying in Boise Blueprint is built for.
Call or text me at 208-891-4200, email Brian@BrianHymas.com, or start at brianhymas.com.

About the author
Brian Hymas
I've spent 35 years in the Treasure Valley — born in Boise, raised in Meridian, lived in Eagle for 8 years, now on acreage in Middleton. Before I was an agent, I was an appraiser. That means I see homes differently than most. I've closed over 120 transactions and more than $100M in sales, but the number I'm most proud of is the families who moved here from California, Washington, and beyond and said it was the best decision they ever made. There's a lot more to the story.
Thinking about a move?
Thinking about moving
to the Treasure Valley?
Start with the 2 minute Boise Match Quiz. Then book a 30 minute call to talk through your matches, budget, and next steps.
Take the 2 Minute Boise Match QuizKeep reading
More from the blog.
Out-of-State Buying Process
Cartwright Ranch Boise: HOA, Maps, Schools and Market Data
A complete Cartwright Ranch Boise neighborhood resource with HOA guidance, visible planning maps, schools, amenities, drive times, builders, recent market data and…
Read →
Out-of-State Buying Process
Moving to Eagle: What Buyers Should Know Before Choosing It
Moving to Eagle: What Buyers Should Know Before Choosing It I lived in Eagle for eight years. Not passing through. Not a…
Read →